Using the Recovery Console, A Windows 2000 technology showcase
On a recent trip to New York, I pulled one of those lovely maneuvers that
we've all done at one time or another: In a bid to dual-boot Windows 98 with Windows 2000 on my laptop, I managed to wipe out the boot files needed to get into Windows
2000, which is my primary OS. Now I always travel with a full set of operating
system and application binaries on CD so that I can re-establish my
system if needed. But I'm also savvy enough to repair a Windows NT boot
record using setup, so I figured the process would be similar in Windows
2000. Alas, that is not the case: In Windows 2000, the repair option
under setup now gives you a choice between two confusing options, neither
one of which is exactly like the old repair functionality. To be honest,
the NT 4.0 repair option was much easier to use, but the repair
capabilities in 2000, which were purportedly designed in response to customer feedback, are
no doubt more powerful.
The two repair options in setup are Recovery Console and the Emergency
Repair Process, which is somewhat similar to the old NT 4.0 Repair
option. However, this requires an Emergency Repair Disk (ERD) to function
properly and, like a goof, I hadn't made one (needless to say, I've since
made one and I won't leave home without it again). As a result, I was
forced to boot into the Recovery Console. What I found was impressive,
especially given the NT legacy of Windows 2000. Let's take a look.
Introduction to the Recovery Console
The Windows 2000 Recovery Console is designed to allow a user with
Administrative privileges to boot a system into a text mode console and
perform, among other things, the following tasks:
- Format drives (partitions)
- Start and stop services
- Read and write files
- Repair a corrupt Master Boot Record (MBR)
- Repair a non-booting system
Now, the Recovery Console is definitely
a power-user feature, but it's got enough going for it that any user with
the appropriate privileges should take the time to figure it out. You can
read and write to any type of partition (including NTFS and CD-ROM),
making it ideal for copying files from any floppy, CD-ROM or hard drive
that might be needed to repair your system.
Booting into the Console from Setup
You can access the Recovery Console from the Windows 2000 setup if your system won't start. Of course, you'll need a bootable CD-ROM drive, a Windows
98 boot disk, or the Windows 2000 setup diskettes. If you're a mobile user without a bootable CD-ROM, I recommend the Windows 98 boot disk approach
because the four-disk Windows 2000 setup routine is slow going. Regardless of how you do it, the goal is to boot your system into the Windows 2000 setup
routine. This will require you to sit through the initial file copying process (which is painful when you just need to repair an existing installation),
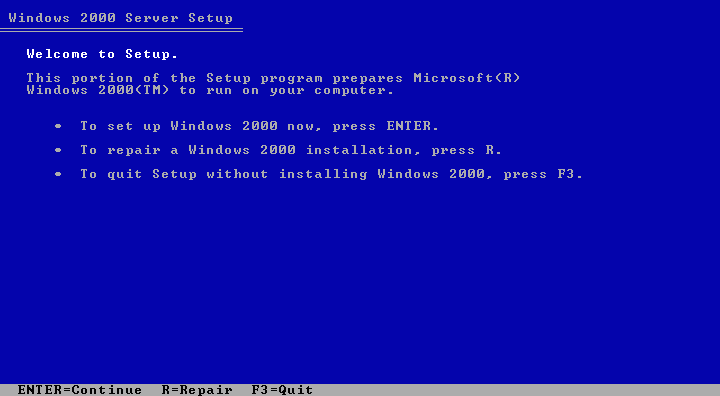
but eventually you'll be given the option to set up Windows 2000, repair a Windows 2000 installation, or quit setup. You want the second option, which is
selected by pressing the R key.
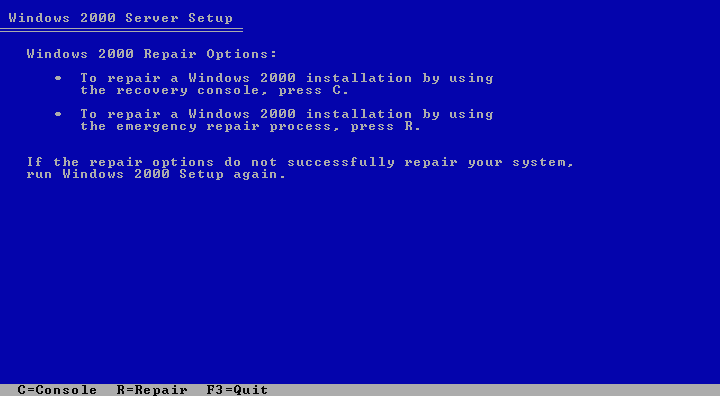
In the next screen, you'll be given two options: Repair a Windows 2000 installation by using the Recovery Console, or by using the emergency repair
process (Figure 1). If you do have the ERD, then by all means choose the second option. But for more
comprehensive repair capabilities and other options, only the Recovery Console will do. Press the C key to continue (Figure
2).
At this point, you are given the option to choose which Windows 2000 installation you'd like to login to. Of course, if you've only got a single Windows
2000 installation on the system (hopefully
|
|